Free All-in-One Office Suite with PDF Editor

Edit Word, Excel, and PPT for FREE.
Read, edit, and convert PDFs with the powerful PDF toolkit.
Microsoft-like interface, easy to use.
Windows • MacOS • Linux • iOS • Android

Catalog
How to Apply a Photo Filter wps guide
Manually editing images for reports or presentations—such as correcting colors or applying stylistic filters—is time-consuming and disrupts workflow. This common pain point is addressed by the integrated photo filter tool within WPS Office, which streamlines the process directly within your document. The steps below demonstrate how to use it.
Step1:Open the Image Editor
Select the image in your document. Click the Edit Image button in the Picture Tools ribbon.

Step2:Navigate to Filters
In the editing panel on the right, click the Color option. This expands to reveal the photo filter section.

Step3:Select and Apply a Filter
In the filter panel, you will find several filter categories. For example, there are types such as Basic, AI Filters ,Portrait ,landscape ,text , food. To apply a filter, simply click on it. Below, I will demonstrate the effects of using photo filters.
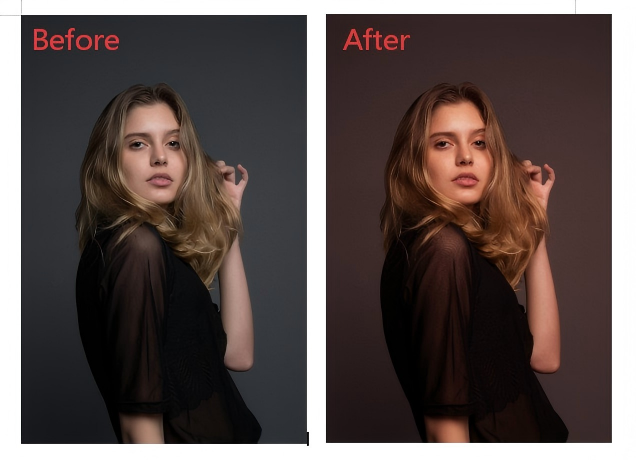
Basic: This category contains essential adjustments like Natural, Warm light, cool and so on.

After applying a filter here, an Intensity slider will appear, allowing you to fine-tune its strength from subtle to strong.

The example below shows the effect of the "Warm Light" filter from the Basic category; you can adjust the Intensity slider to your preference.
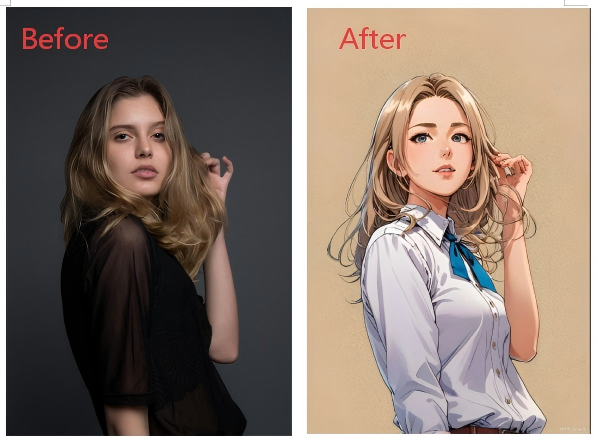
AI Filters: This section offers advanced AI-powered artistic styles, such Picture book or Anime, which apply complex visual transformations with one click.

The example below shows the effect of the “Anime" filter from the Basic category; you can adjust the Intensity slider to your preference.
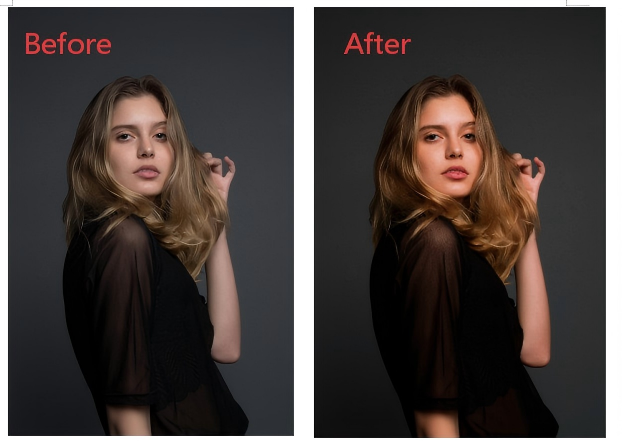
Portrait: Designed for photos with people, this category provides presets like Bright, Sweet and so on to enhance skin tones and lighting.

The example below shows the effect of the "Sweet" filter from the Basic category; you can adjust the Intensity slider to your preference.
Other Categories: You can also explore Landscape, Text, and Food filters, which are optimized for their respective image types.

Step4:Save Changes
Once satisfied, click Done at the top of the panel. The filtered image will update directly in your document.

Extra Tips
For applicable filters, use the Intensity slider that appears after application to precisely control the effect's strength.

Conclusion
Unlike many office suites that lack native photo editing or require external software, WPS Office integrates a full range of photo filters directly into the document environment, allowing for seamless visual adjustments without leaving your workflow. This eliminates the need for separate applications, file exports, or re-uploads, ensuring that your editing process is integrated, efficient, and fully contained within your original project. This built-in functionality exemplifies WPS Office's commitment to providing a comprehensive, all-in-one productivity solution that addresses real-world document creation needs.
Also Read:
- 1. WPS Photo Editor 2026: Streamlining Photo Editing
- 2. How to Apply Background Blur in WPS Office
- 3. How to apply the split entrance effect in WPS Office PowerPoint
- 4. How to Apply Linear Down Gradient Fill in Excel Using WPS Office (Step-by-Step)
- 5. How to cancel filter in WPS Spreadsheet
- 6. How to Apply a Gradient Background in PowerPoint Using WPS Office (A Comprehensive Guide)


15 years of office industry experience, tech lover and copywriter. Follow me for product reviews, comparisons, and recommendations for new apps and software.


